Introduction in windows 11 start menu not working
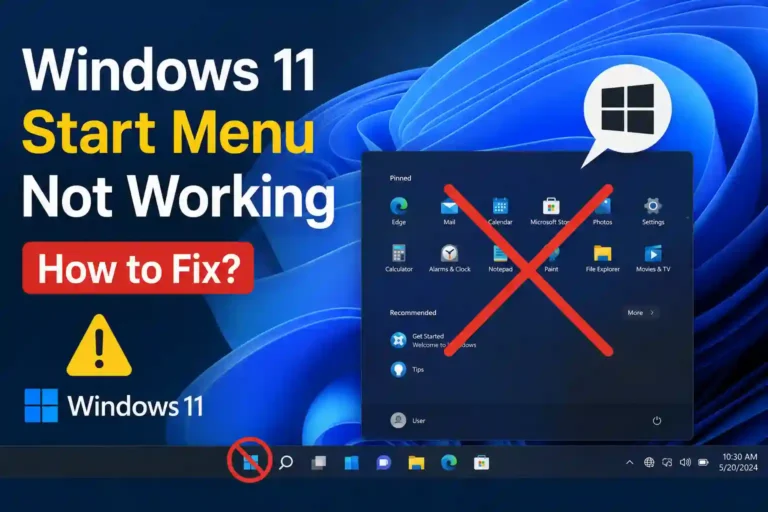
Clicking your Windows key and seeing nothing happen feels like broken tech magic. You expect the Start menu to appear but get a blank screen instead. Maybe it crashes immediately or shows missing app icons. This problem wastes hours of work time and creates daily frustration. Start menu failures come from many causes like Explorer glitches or damaged system files. Sometimes bad updates or third-party software block the menu from loading. We will walk through each fix step by step. Start with quick solutions before moving to deeper repairs. This path protects your files while restoring functionality.
Start With Quick Fixes – That Restore the Start Menu Safely
These first methods cost nothing and won’t touch your personal data. They target temporary process stops that commonly block the Start button. Restarting core processes often fixes the issue instantly without rebooting the whole system. Try these before trying anything more complex or risky.
Restart Windows Explorer from Task Manager
Your Start menu lives inside the Windows Explorer process running in the background. When this process stalls, clicking the Start button does nothing visible. Restarting it refreshes the taskbar and brings back the menu interface. Open Task Manager using Ctrl plus Shift plus Escape on your keyboard. Switch to Processes tab if you see the simplified view first. Click More details to access the full process list. Scroll down until you find Windows Explorer in the list. Right-click that entry and select Restart from the context menu. Your desktop icons vanish briefly then reappear within seconds. Test the Start button again after the refresh completes fully. Many users report immediate success with this single action.
Restart the Computer Using a Keyboard Shortcut
Sometimes a simple restart clears stuck memory states blocking interface functions. This method works even when the Start button itself fails. Press Ctrl plus Alt plus Delete simultaneously to access recovery options. Select the power icon shown in the bottom right corner. Choose Restart from the available shutdown options to begin the process. Wait patiently as Windows closes apps and shuts down completely. Another restart loads fresh system services ready for normal use. Alternatively press Alt plus F4 while sitting on your desktop screen. Pick Restart from the dialog box that appears. Avoid forcing shutdown unless Windows stays frozen for too long. A clean restart helps clear temporary interface bugs effectively.
Check Whether the Windows Key or Keyboard Is the Problem
Your keyboard might be failing rather than the Start menu itself. First click the Start button directly with your mouse instead of pressing keys. If clicking works but the key doesn’t, the physical button could be faulty. Some keyboards have a gaming mode that disables the Windows key intentionally. Look for a lock indicator light or check keyboard settings for disabled keys. Try an external keyboard if your laptop keys feel unresponsive. You can also test with the on-screen keyboard accessible through accessibility features. Distinguishing hardware issues from software problems saves unnecessary troubleshooting time.
Step1: Repair Windows Components Behind a Frozen or Missing Start Menu
System file corruption or damaged Windows components often break the Start menu. Built-in repair tools scan and replace corrupted files automatically. These commands fix deeper problems that simple restarts cannot address. Microsoft designed these utilities specifically for shell experience issues like yours. Run them in order starting with System File Checker.
Run System File Checker
SFC scans protected Windows files and replaces damaged copies with working versions. This tool finds and fixes integrity violations in system files. Open Task Manager using Ctrl plus Shift plus Escape to begin. Select File menu then choose Run new task to open command prompt. Type cmd in the text field and enable administrative privileges checkbox. Click OK to launch the elevated Command Prompt window. Enter sfc slash scannow and press Enter to start scanning. This process takes five to fifteen minutes depending on drive speed. Results show whether files were repaired or already intact. Restart the computer after the scan finishes checking everything. If SFC reports unrepaired files, proceed to DISM next.
Use DISM to Repair the Windows Image
DISM fixes the component store when System File Checker fails completely. This command rebuilds the Windows image source used for repairs. Access Command Prompt through Task Manager exactly like earlier steps. Type DISM followed by Online Cleanup-Image RestoreHealth flags. Wait for the process to complete fully before closing the window. This operation may take longer than SFC scanning alone. After DISM finishes run sfc slash scannow again for best results. The second pass catches any remaining corrupted files after rebuilding. Restart Windows and test your Start menu immediately afterward. Many cases resolve after running both repair tools successfully.
Re-Register the Windows Shell Packages
Damaged AppX packages prevent the Start menu from launching correctly. Re-registering these built-in apps restores their proper configuration state. Open Task Manager and select Run new task from the File menu. Type powershell and enable administrative privileges before opening it. Paste this exact command into the PowerShell window: Get-AppxPackage AllUsers | Foreach {Add-AppxPackage DisableDevelopmentMode Register “$($_.InstallLocation)\AppXManifest.xml”} Press Enter and wait for processing to complete. You might see red error messages ignore them during this phase. Some packages fail because they are currently in use by Windows. The goal is fixing all recoverable packages regardless of errors shown. Restart your computer once the command finishes executing. Test the Start menu after restarting to confirm success.
Step2: Fix Start Menu Problems Caused by Updates Services or Background Conflicts
Recent Windows updates sometimes introduce new bugs affecting core features. Third-party applications or conflicting services also interfere with menu operations. Identifying these external factors helps determine which fix applies to your case. Check update history and disable startup programs causing interference.
Install Pending Windows 11 Updates
Microsoft regularly releases patches addressing known Start menu bugs. Cumulative updates contain fixes for shell experience issues frequently. Open Settings using Windows plus I keyboard combination quickly. Navigate to Windows Update section in the left panel. Click Check for updates button to scan for pending installations. Install any available updates and restart your computer afterward. Updates restore stability by patching known vulnerabilities and bugs. If Settings fails to open use Task Manager to launch ms-settings colon windowsupdate. This command opens Windows Update directly even when Settings is blocked. Keep your system current to avoid recurring problems later.
Remove a Recently Installed Update When the Problem Started After Updating
Rollback becomes necessary when a recent update introduced the failure. Identify the exact update date matching symptom onset carefully. Open Settings then go to Windows Update and Update history. Click Uninstall updates option to view installed quality updates list. Review the dates and descriptions of recently added patches. Select any update installed around the time issues began appearing. Choose Uninstall button if the option remains available for removal. Restart the computer immediately after removing the problematic update. Test the Start menu before installing another patch later. Temporary rollback provides relief while waiting for newer fixes.
Test Windows in a Clean Boot Environment
Third-party tools often conflict with Windows shell components silently. Startup applications antivirus software or overlay programs can disable menus. Perform a clean boot isolating essential Windows services only. Open Task Manager and disable all nonessential startup apps listed. Run msconfig command to open System Configuration utility quickly. On the Services tab hide all Microsoft services checkboxes first. Temporarily disable remaining non-Microsoft services one group at a time. Restart your machine and test the Start menu functionality. Re-enable services gradually to identify which caused the conflict. Investigate software categories like shell customizers or optimization tools.
Step3: Determine Whether the User Profile Is Corrupted
Start menu problems may stem from corrupted profile data rather than system files. Testing a new account reveals whether the issue travels with your user data. Profile migration becomes the solution if a separate account works fine. Back up your files before attempting profile reconstruction procedures.
Create and Test a New Local User Account
A new account isolates Windows installation issues from profile-specific corruption. Open Settings navigate to Accounts and Other users sections. Select Add account option to create a local test account quickly. Sign in to this new account and try the Start menu. Success indicates your original profile contains corrupted configuration data. Moving files to a repaired profile resolves the issue permanently. Failure across multiple accounts points toward broader Windows component damage.
Repair or Rebuild the Affected User Profile
Profile migration preserves your documents and preferences during transition. Backup folders including Desktop Documents Downloads Pictures carefully first. Verify access to browser data cloud storage and licensed applications beforehand. Don’t delete your original profile until everything transfers successfully. Some programs require reconfiguration or reinstalling in the new account. Migration keeps most settings while bypassing corrupted registry hives entirely. This approach works better than attempting complex profile repairs manually.
Check Account Permissions and Windows Services
Disabled essential services block the Start menu from functioning properly. Confirm your account can open Settings Task Manager and Explorer. Ensure critical Windows services remain enabled through system configuration changes. Avoid altering service startup types without understanding implications first. Incomplete account setup sometimes causes similar failures too. Review security permissions if standard fixes don’t restore access.
Step4: Use Advanced Recovery Options When Standard Fixes Fail
Deeper problems need advanced recovery tools when surface fixes fail. System Restore returns files and settings to earlier functional states safely. An in-place upgrade replaces damaged components while keeping personal data intact. Resetting Windows serves as a last resort for severe corruption cases. Always back up important files before attempting these procedures.
Perform a System Restore
System Restore reverts system files drivers and registry settings without losing documents. Open Restore utility by running rstrui exe through Task Manager. Select a restore point created before symptoms started appearing recently. Review affected programs displayed in the preview window before confirming. Restart Windows automatically after restoration completes successfully. Test the Start menu to verify previous functionality returned. System Restore may not exist if protection was disabled previously. This option works best when recent changes triggered the failure.
Repair Windows With an In-Place Upgrade
In-place upgrades replace damaged Windows components preserving most settings and apps. Download official Windows 11 installation media directly from Microsoft websites. Run setup exe file located inside the mounted installation folder. Choose the keep personal files and apps option carefully during setup. Follow installer prompts allowing multiple restarts throughout the process. This method reinstalls core Windows files while maintaining user data securely. Backups protect against unexpected outcomes during extended repair times. Correct preservation options prevent accidental file loss during repairs.
Reset Windows 11 as a Last Resort
Factory resets resolve operating-system corruption affecting all user profiles completely. Open Settings navigate to System and Recovery sections together. Select Reset this PC option to begin the process carefully. Choose Keep my files or Remove everything based on situation needs. Cloud download provides fresher system files when local options fail. Backup passwords recovery keys and application credentials beforehand absolutely. Remove-everything option deserves careful consideration before selection starts. Use this only when other repairs failed repeatedly over time.
Step5: Prevent the Windows 11 Start Menu From Failing Again
Regular maintenance reduces future Start menu failures significantly. Stay updated with supported Windows releases and driver updates always. Maintain reliable backups protecting data when repairs become necessary. Avoid aggressive system-modification tools interfering with shell components regularly.
windows 11 start menu not working
Keep Windows and Device Drivers Updated
Installed updates fix known shell and Start menu bugs continuously. Check Windows Update regularly to maintain system health proactively. Obtain drivers from manufacturer sources avoiding unofficial modification tools. Create restore points before major driver or system changes whenever possible. Unofficial shell replacements cause compatibility issues with newer updates. Supported updates keep your system stable and secure overall.
windows 11 start menu not working
Maintain Reliable Backups
Backups protect documents when profile replacement or repair installs needed. Use OneDrive File History or external drives for consistent backup strategies. Verify backups actually open and restore correctly periodically. Store recovery keys and important credentials in secure locations always. Data protection matters more than fixing technical issues repeatedly. Reliable backups save time during difficult repair situations.
windows 11 start menu not working
Remove or Review Shell-Customization Utilities
Start menu replacements taskbar tweaks and registry cleaners interfere with Windows. Uninstall any tools modifying the Start menu immediately upon problems. Restore default Windows settings before testing functionality again. Registry cleaners claiming automatic repair capabilities should be avoided completely. Aggressive optimization tools often create more problems than they solve. Removing modifications usually restores native Windows behavior reliably.
windows 11 start menu not working
Conclusion: Restore the Start Menu Without Losing Your Data
Follow the recommended sequence starting with least intrusive methods first. Restart Explorer and the computer before attempting deeper repairs. Run SFC and DISM commands to repair corrupted system files. Re-register Windows apps if simple fixes don’t work initially. Install or roll back relevant updates identified in history checks. Test clean boot environments and create new user accounts for diagnosis. System Restore in-place repairs or reset Windows only when necessary. A working Start menu in a new account signals profile corruption issues. Failure across multiple accounts suggests broader Windows component problems. Protect your data with backups before any major repair procedures begin.